Northside ISD Online Vendor Registration (“Bonfire Interactive”)
The Northside ISD Purchasing Office uses an online electronic procurement system called “Bonfire Interactive.” This electronic procurement system allows the Purchasing Office to maintain accurate information about Bonfire Interactive registered vendors and the goods and/or services they want to sell to the District. Bonfire Interactive electronically notifies those registered Vendors of Northside ISD bid opportunities that are relevant to their business and it allows interested Vendors to electronically submit their bids to the Purchasing Office for evaluation.
If you wish to be considered for Bonfire Interactive electronic notification of bid opportunities that meet your company’s profile and expertise, please register online for this service. There is no charge to register.
- All contracts that exceed $50,000 in the aggregate within a one-year period are released for competition among interested vendors using one of several bidding methods authorized by the state.
- Opened bids are reviewed by the Purchasing Department and then evaluated by the originating department, and a recommendation for award is made based on the criteria established by the Texas Education Agency and based on requirements specifically enumerated in the bid documents.
- Contract awards are made by the Board of Trustees at their monthly Board meetings.
- All purchases of goods and or services must be from a Board approved NISD Awarded vendor, Cooperative, or an Interlocal Agreement.
Northside's Board of Trustees has authorized participation in several Cooperative Purchasing organizations.
- Central Texas Purchasing Alliance (CTPA)
- Choice Partners (CP)
- Educational and Institutional Cooperative Services (E & I)
- Education Service Center (ESC) Region 4 / OMNIA Partners
- Education Service Center (ESC) Region 8 / The Interlocal Purchasing System (TIPS-USA)
- Education Service Center (ESC) Region 10 / Equalis Group, LLC
- Education Service Center Region 19 - Allied States Cooperative
- Education Service Center Region 20
- Harris County Department of Education (HCDE)
- Houston-Galveston Area Council (HGACBuy)
- Sourcewell
- State of Texas Department of Information Resources (DIR)
- The Local Government Purchasing Cooperative (TASB Buyboard)
- Texas Comptroller of Public Accounts (TXMAS)
Registration Information
Registering for a New Vendor Account is very simple and consists of the following steps:
1. Account Creation
On the Procurement Portal of the organization you'd like to register with, click on New Vendor Registration:
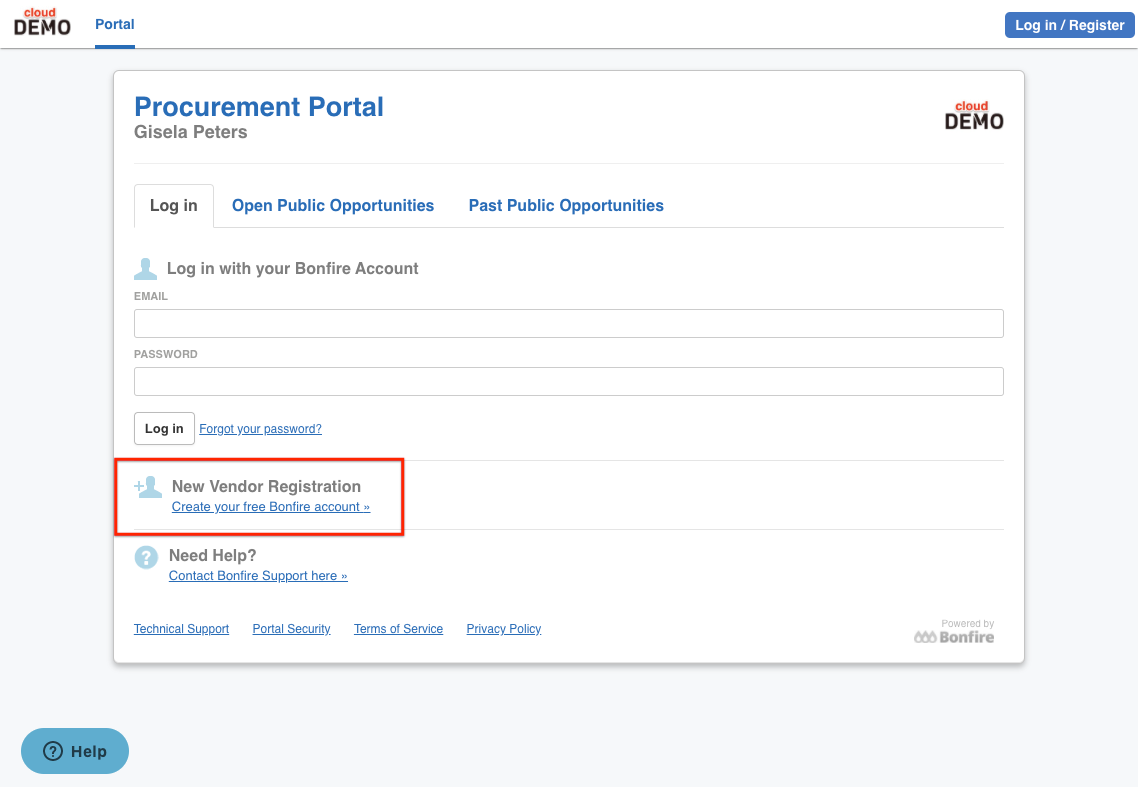
If you do not have a specific portal you wish to register on, you can register via our Global Demo Portal.
NOTE: The Global Demo Portal can be used for registration and adjusting your Global Vendor Settings. However, you will NOT see any Public listings of bids within this portal.
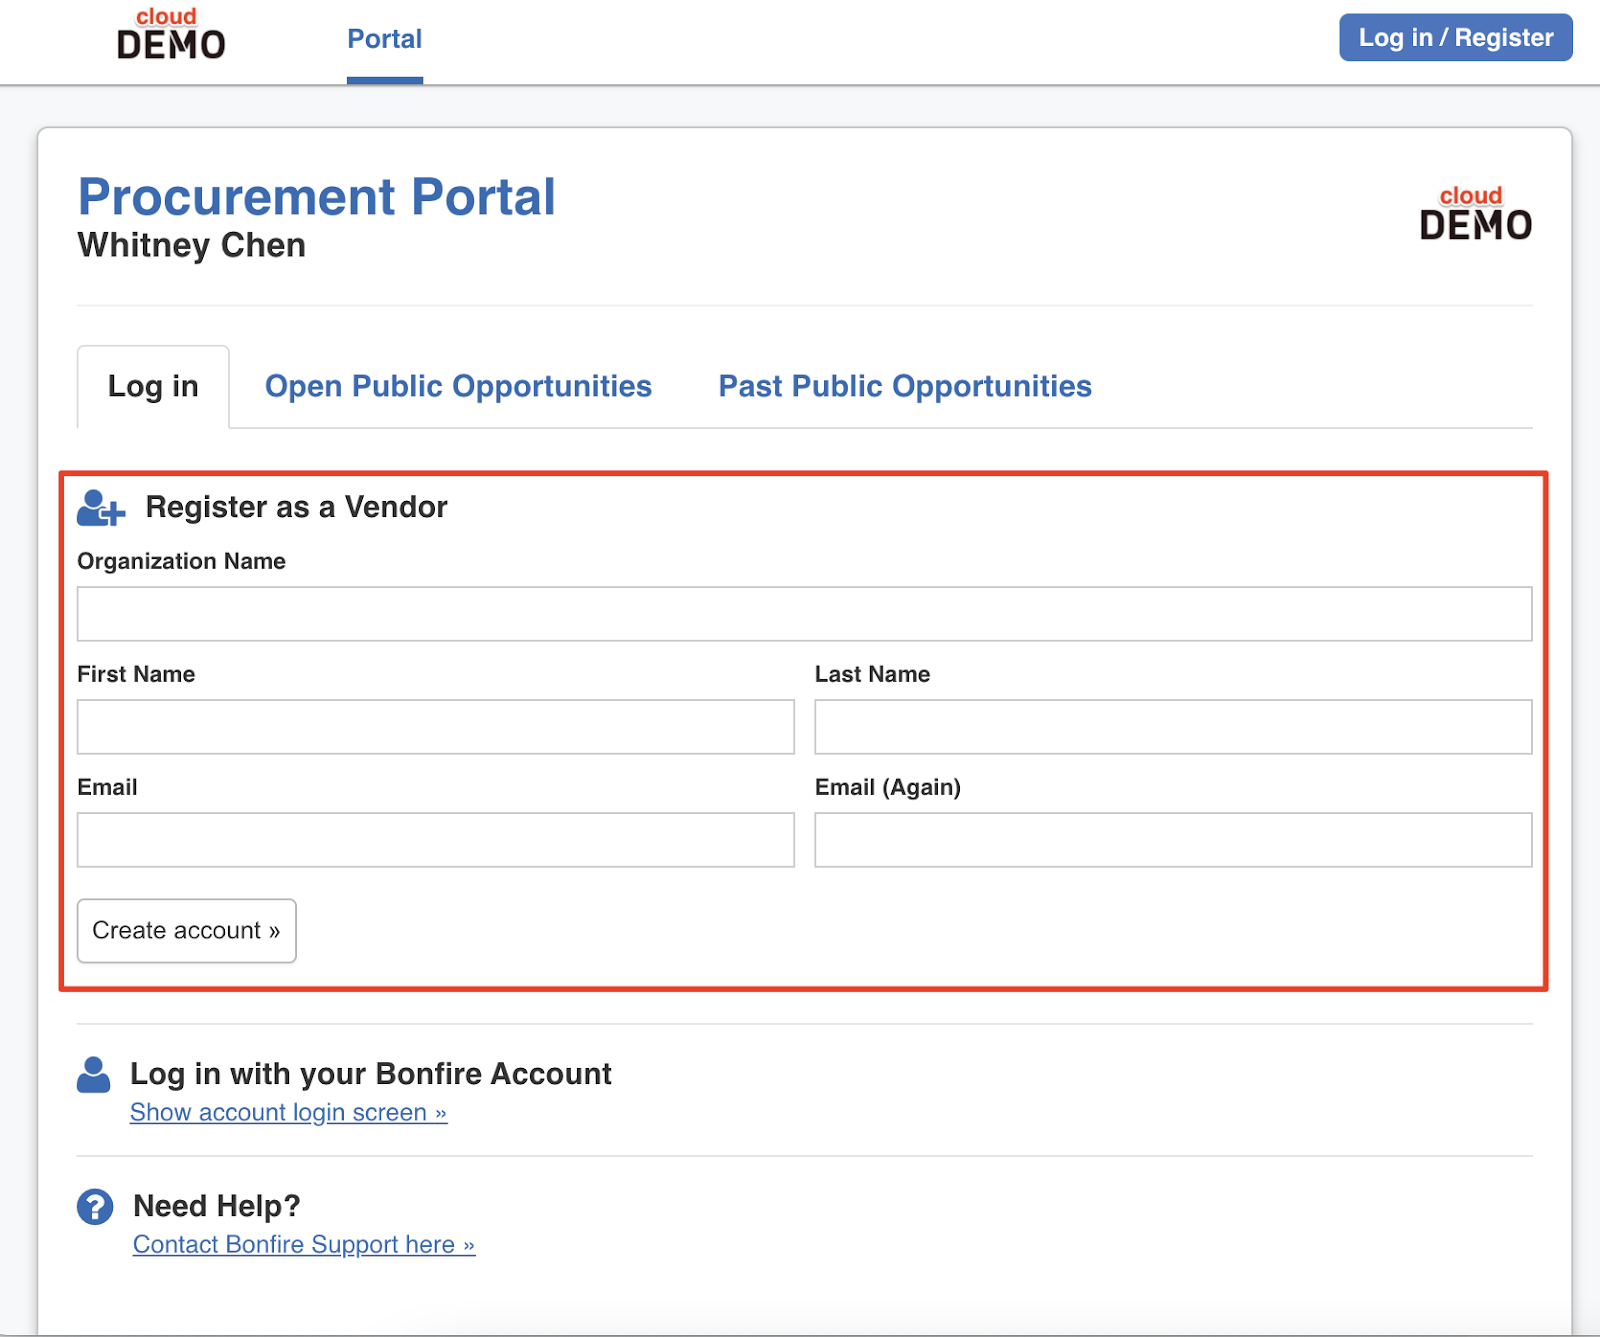
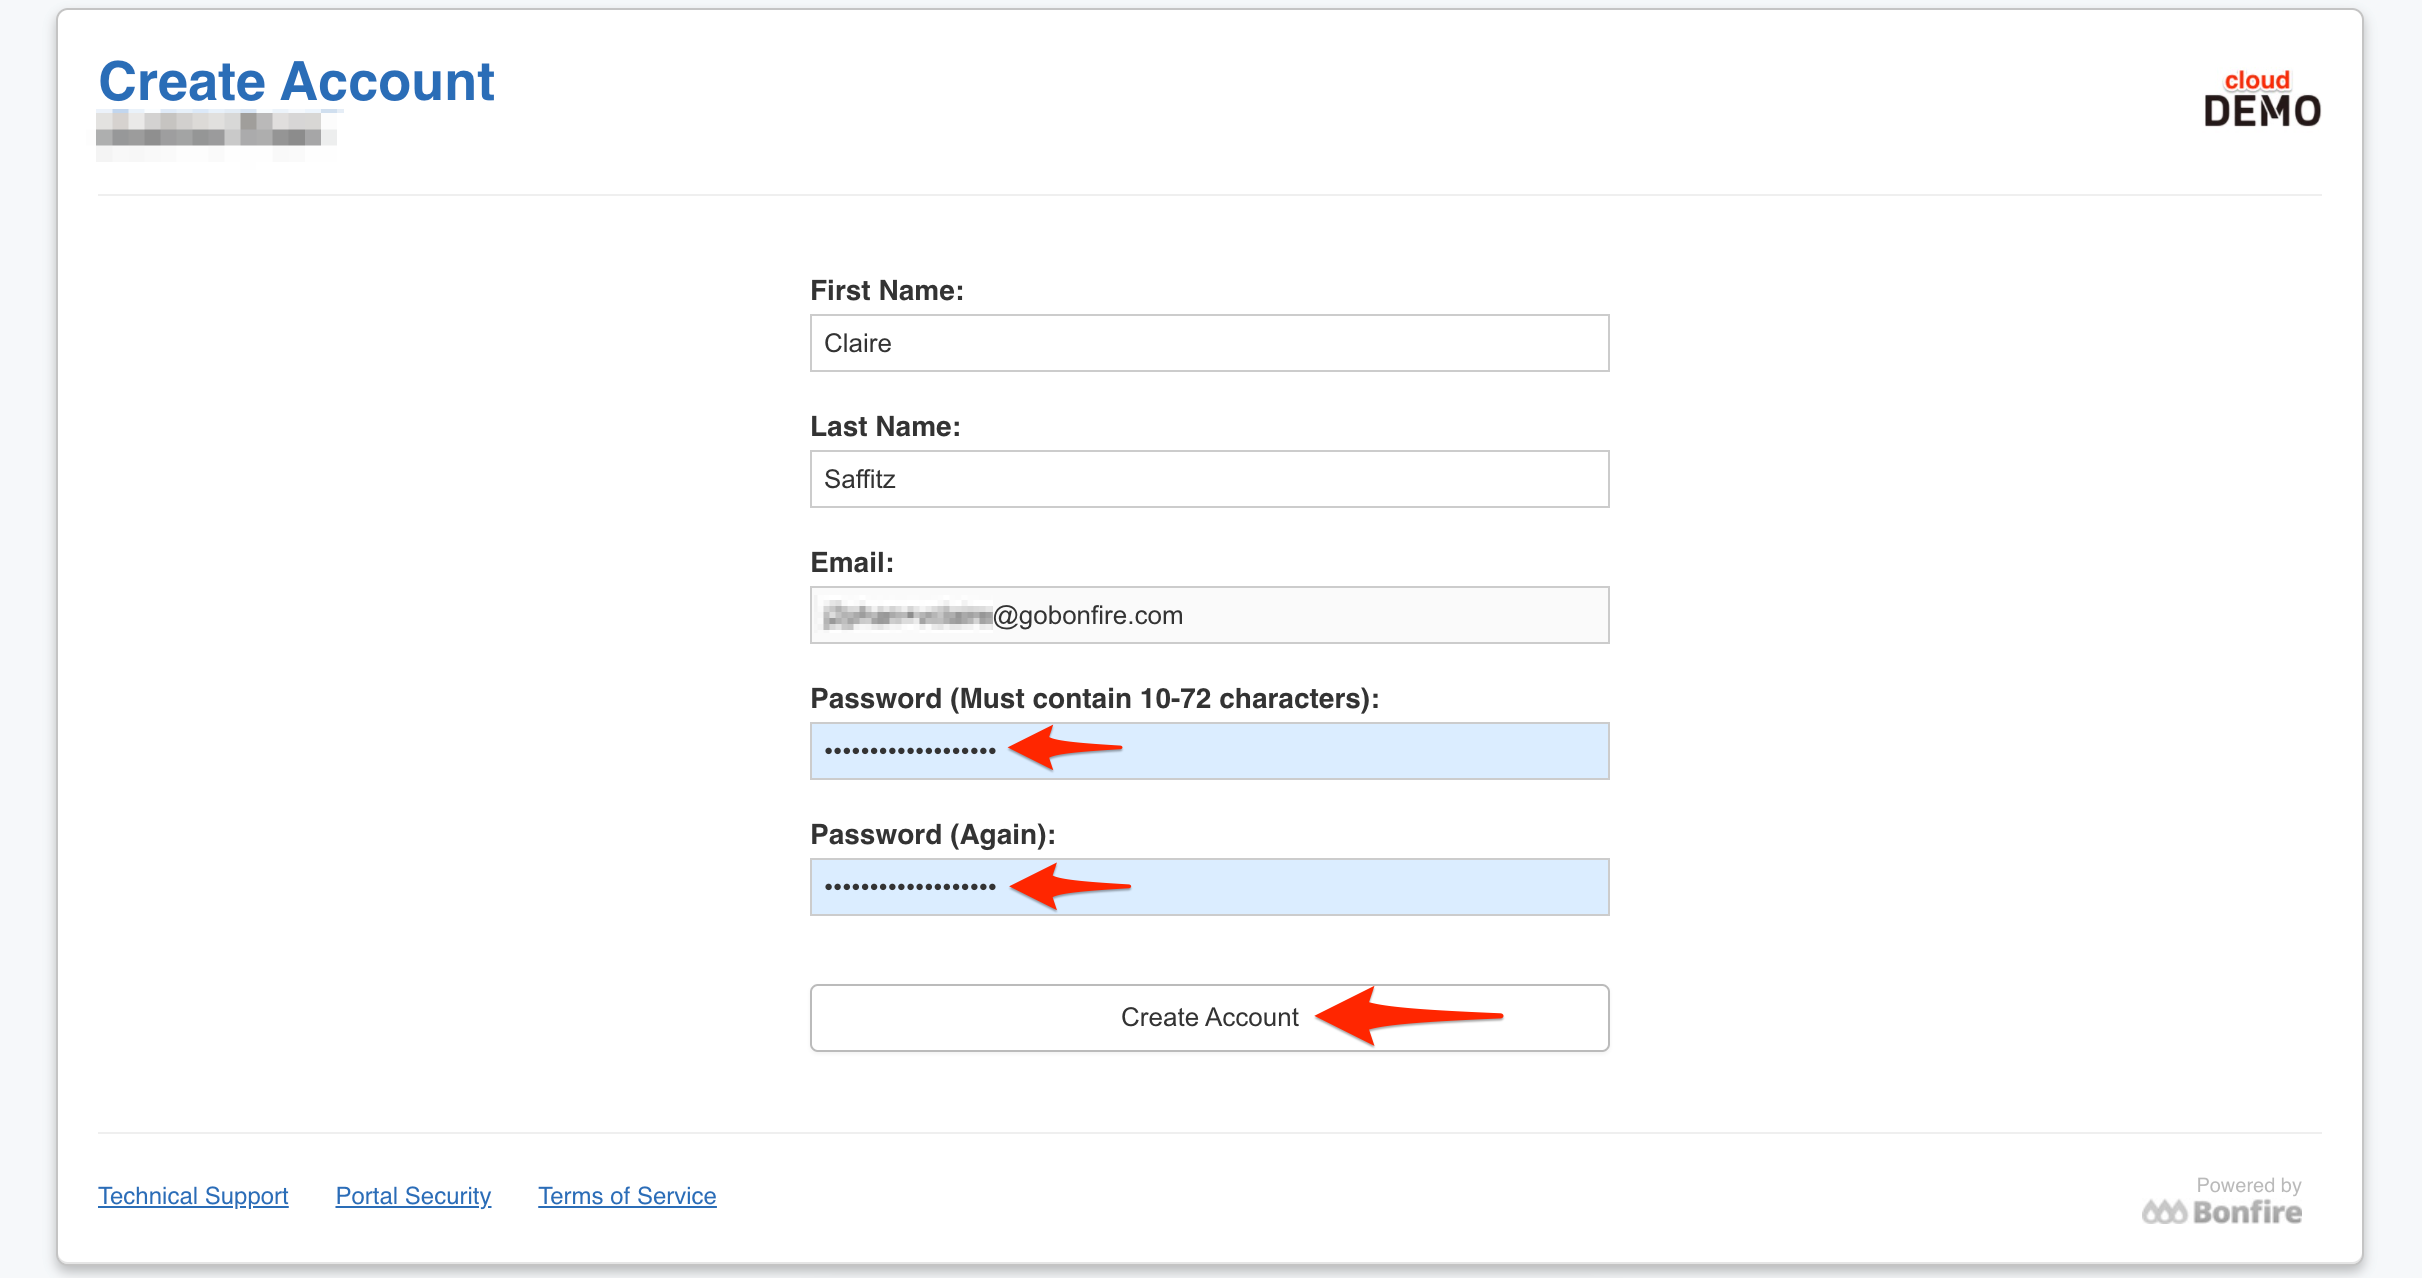
Fill out all of the listed fields and then click on Create Account:
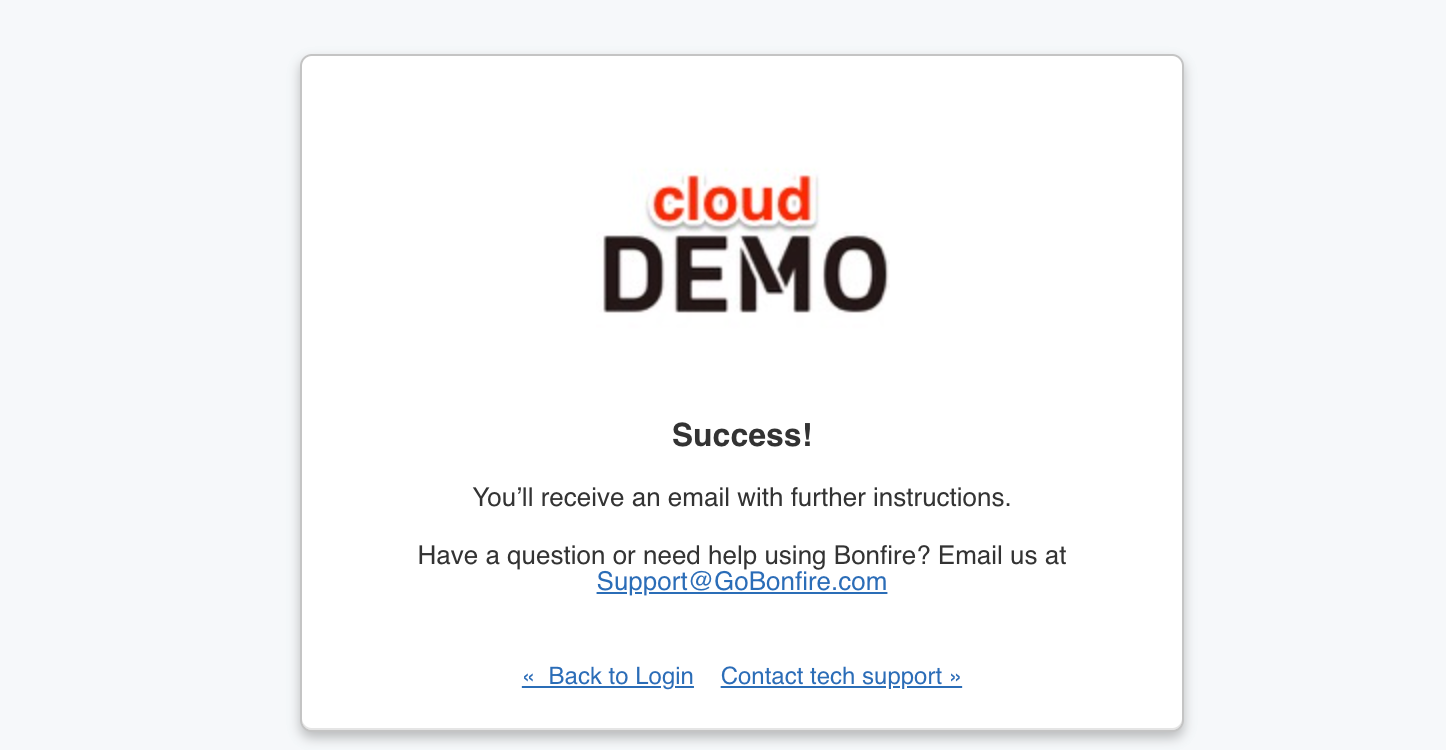
You'll know your account was created successfully if you see a Success message:
2. Create a Password
To continue with the registration process, check your inbox for an email confirmation. The email will have the "You've signed up to be a Bonfire Vendor and need to finish registering" subject line.
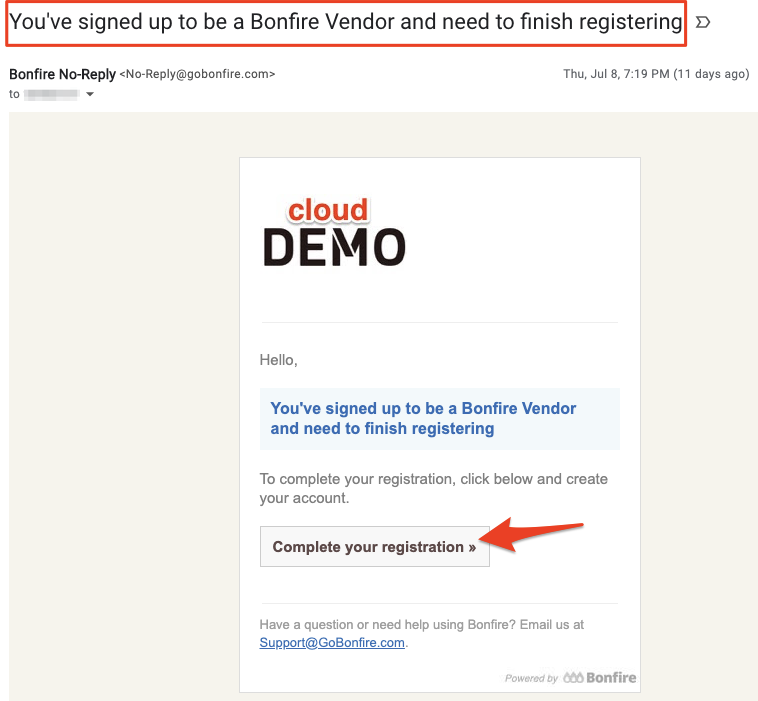
Clicking on Complete your registration will take you back to Bonfire's registration page where you can create a Password. Click Create Account to continue the process.
3. Account Confirmation
NOTE: If you don't receive this email in 5 minutes, please see our Why am I not receiving emails? page.
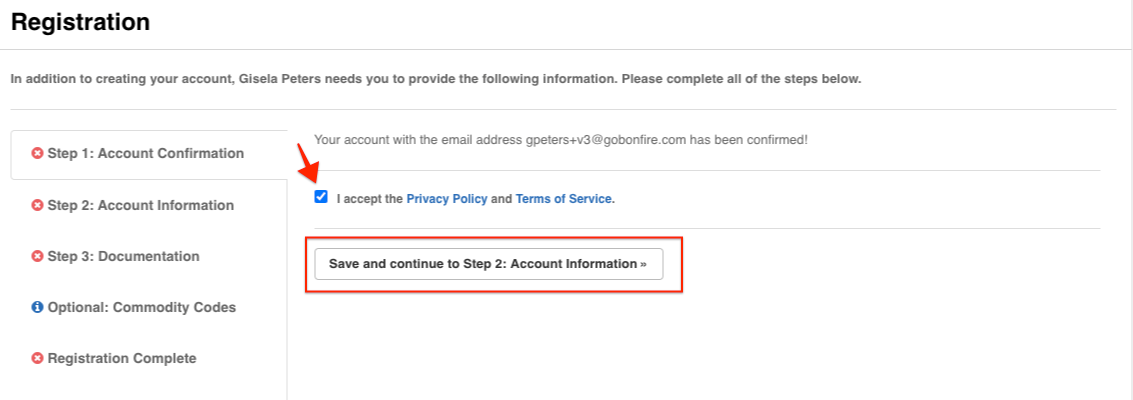
After creating your password you'll continue to the Registration screen and can complete Step 1 by accepting the Privacy Policy and Terms of Service.
4. Account Information
You can now fill out further information to add to your Vendor Record:
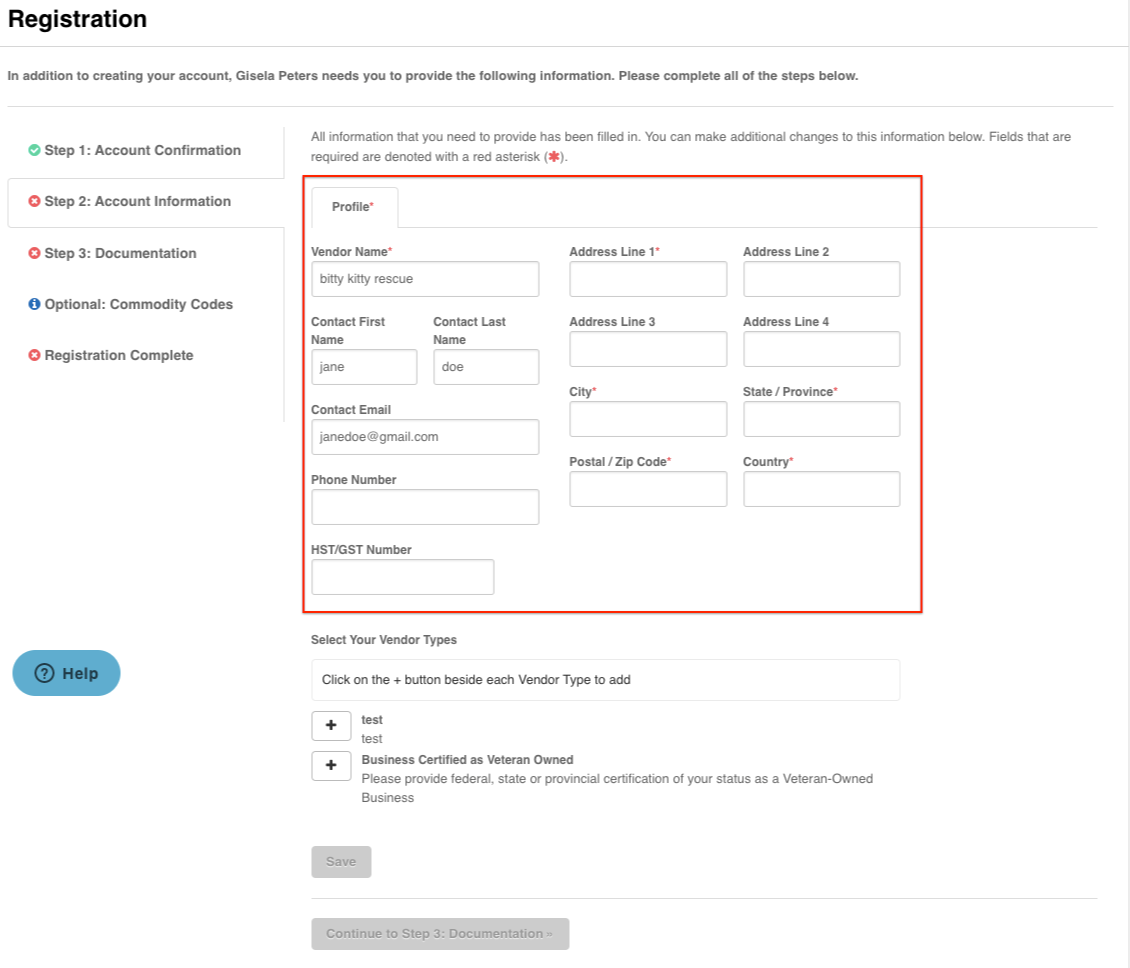
NOTE: Be sure to fill out all the fields marked with a red asterisks otherwise you will not be able to complete your registration.
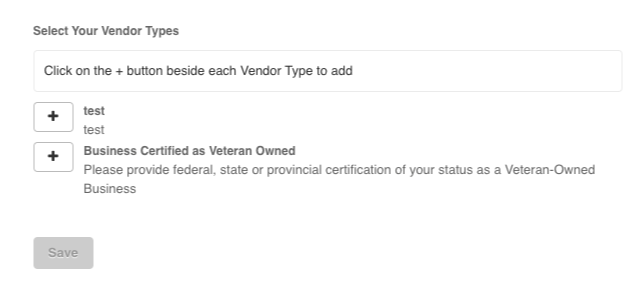
If the organization you're registering with has set up Vendor Types, you will also be able to select and self-identify which Vendor Types you belong to. You can select more than one Vendor Type if more apply.
If the organization has also set up Custom Fields in association with a particular Vendor Type you've selected, you will see an additional tab populate labeled Custom Fields, which is located next to the Profile tab:
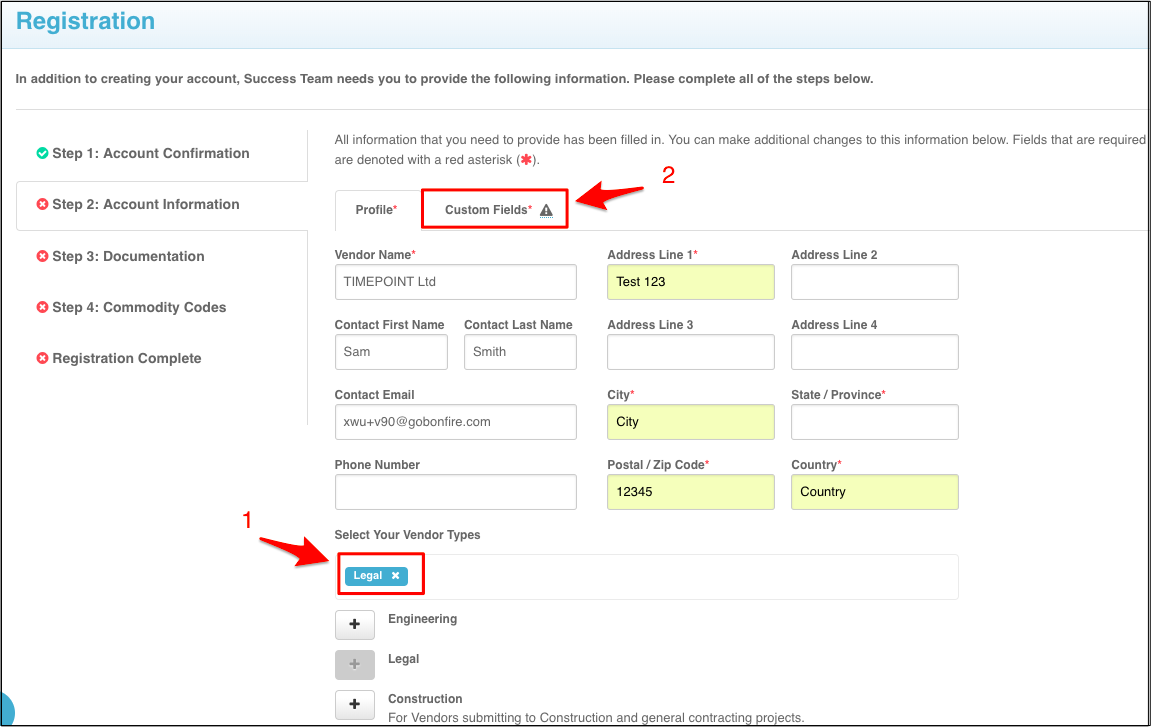
Within the Custom Fields tab, you will see any sections that you will need to complete based on the Vendor Types you selected:

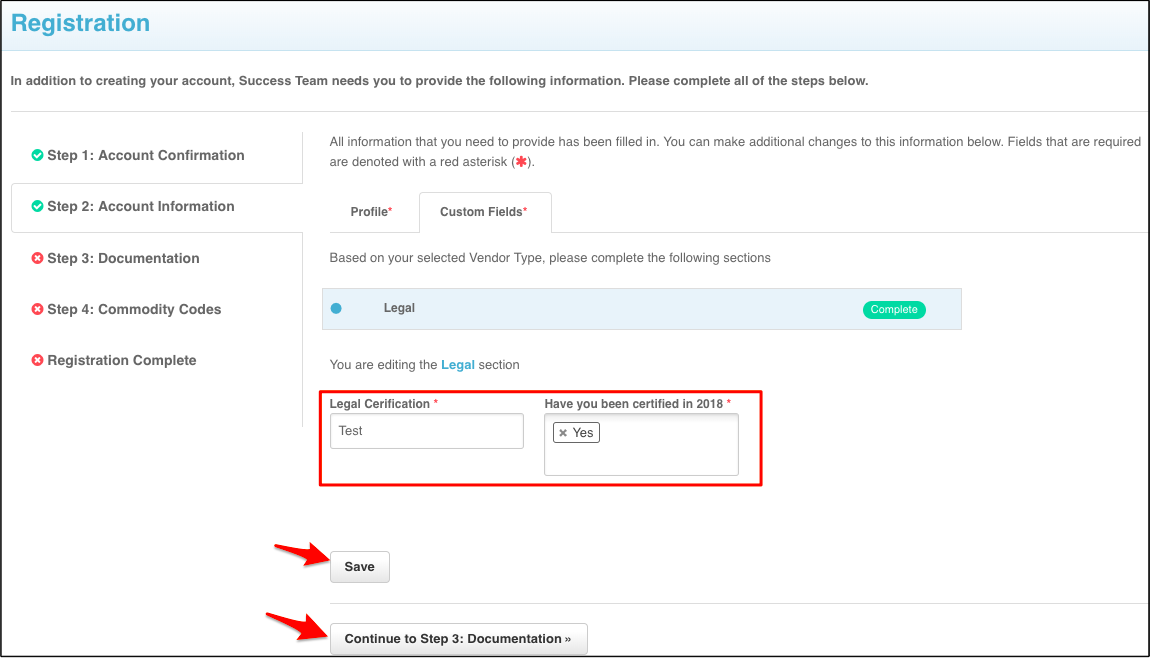
Once you fill out the necessary information, the orange Incomplete status will update to a green Complete status. You can then click Save and then Continue to Step 3: Documentation.
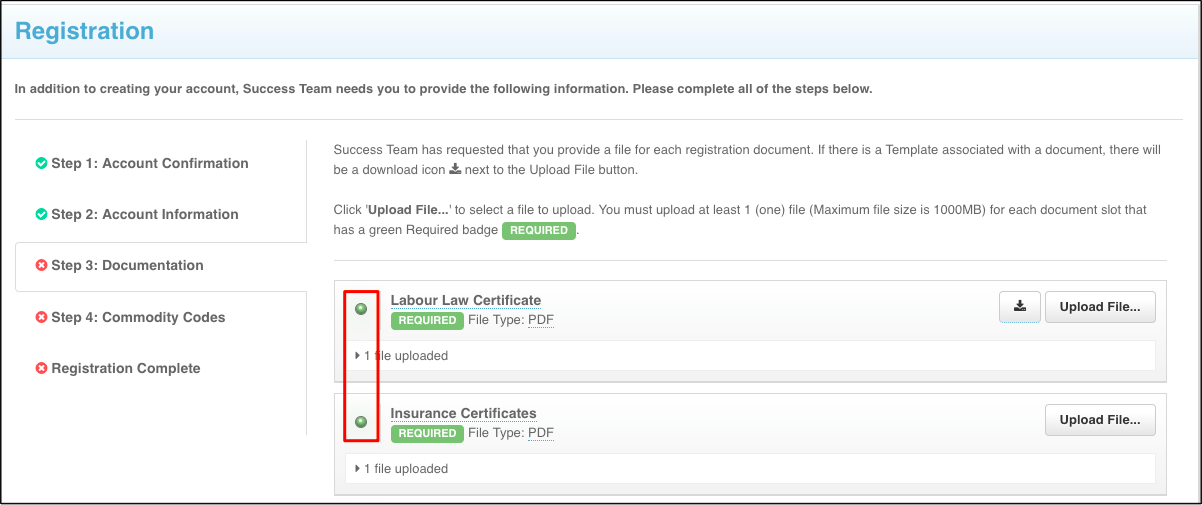
5. Documentation
For this step, you will be presented with any Documentation the Buyer requires you to upload as part of the Vendor Types you have selected.
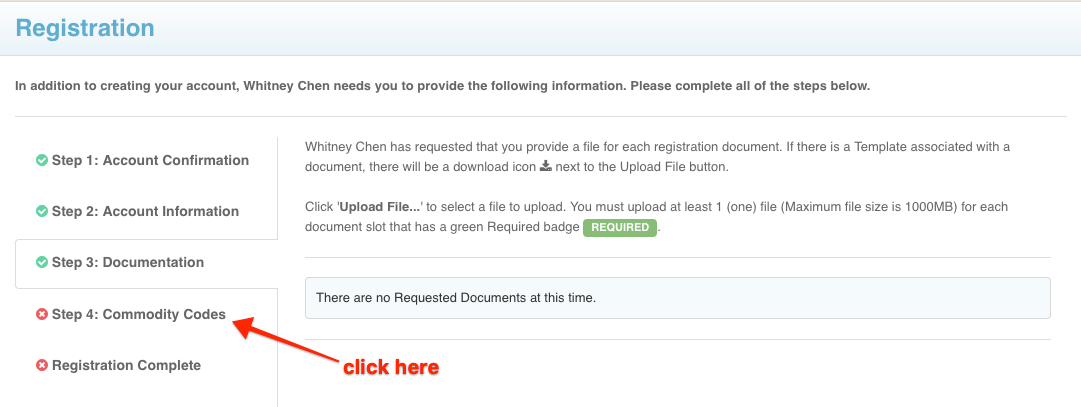
NOTE: If no documentation is required and you see a message that says, "There are no Requested Documents at this time", you can proceed to the next step by clicking it on the left sidebar:
Some documentation may have a template attached, which you can click on the download icon to retrieve and fill out:
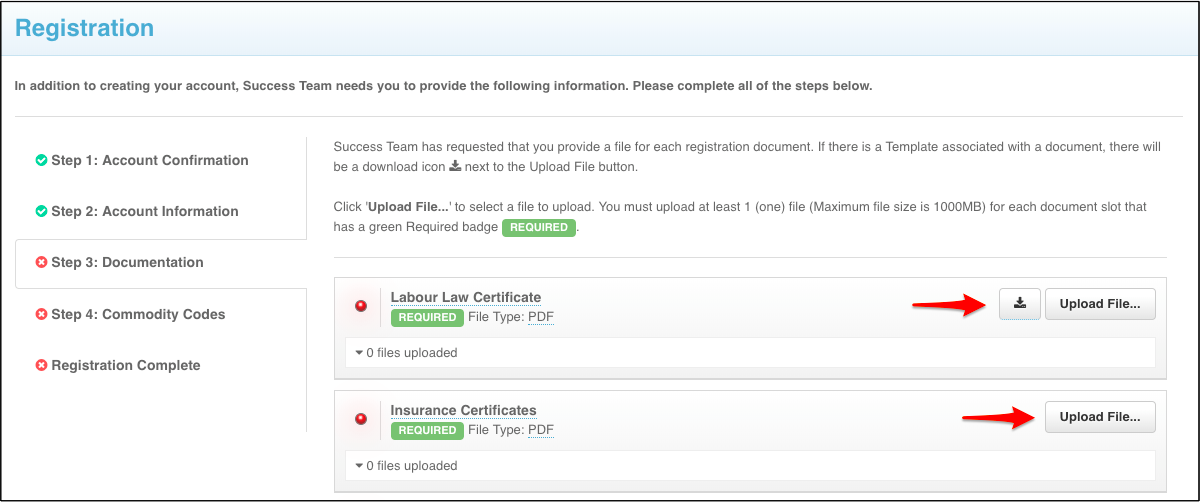
Once you have the correct document you'd like to submit, click the Upload File... button in the same box as the slot you wish to upload to:
You will be prompted to choose the file you wish to upload as well as select an expiration date if required by the organization. As a vendor, you will receive notifications when a requested document is expiring or has expired.
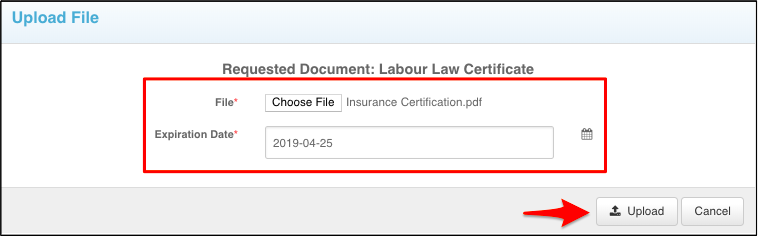
NOTE: You will receive email notifications for documents that are expiring within 30 days as well as for documents that have already expired. This notification will be sent out every 15 days. If you accidentally select the wrong expiration date when you upload a file, you can change this by clicking on the file slot, deleting the document and then re-uploading the document again:
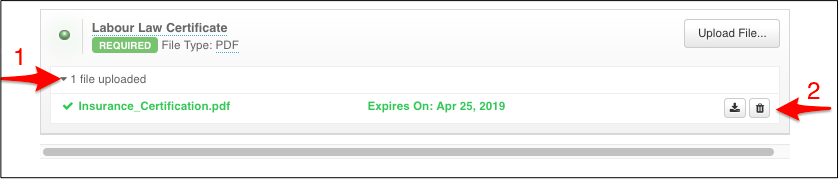
Once the file has been uploaded, the red status button will turn green and you will be able to move to the final registration step:
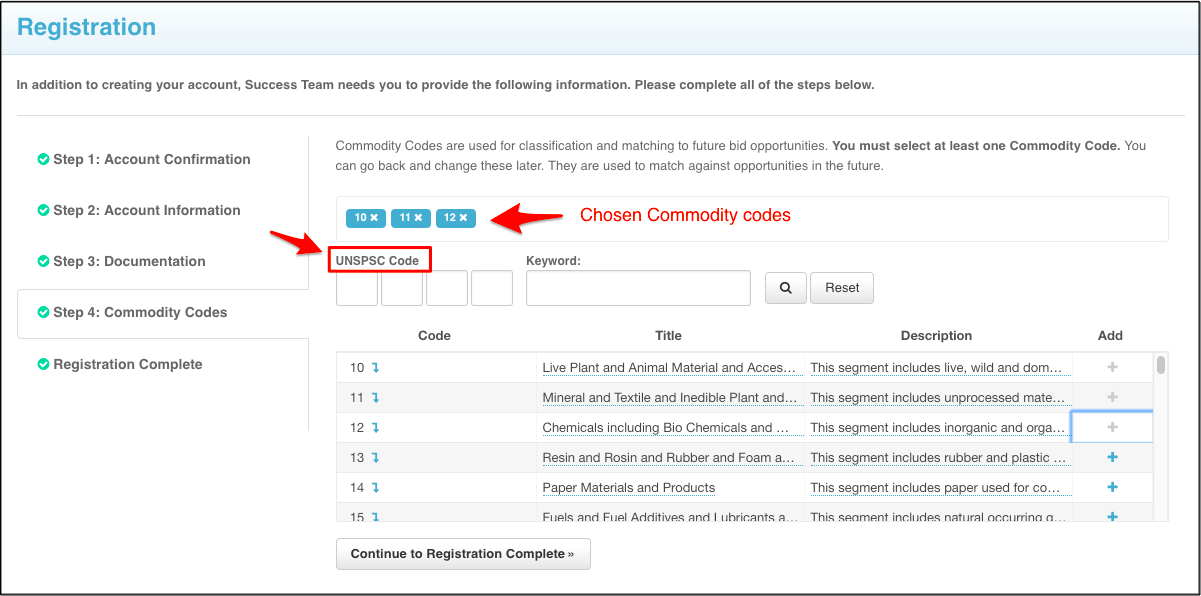
6. Commodity Codes
Commodity Codes are used for classification purposes. If they are listed as "Optional" in the sidebar, then you only need to add codes if you are interested in being matched to future bid opportunities.
The type of code set being used is determined by the purchasing organization you're registering with. The code set being used will be displayed above the search bar text box (to the left of Keyword). You can search for codes using keywords or browse the table freely. Click Add next to the code you'd like to add. Codes added to your profile will appear in blue boxes at the top of the page; you can hover your cursor over each to see what the code is for.
For more information, please see our Quick Guide to Commodity Codes and our How do I add or delete Commodity Codes on my Vendor Record? page
Registration Complete
Once you have completed all of the steps and a green checkmark appears to each step in the sidebar, you will see a green Success! message:
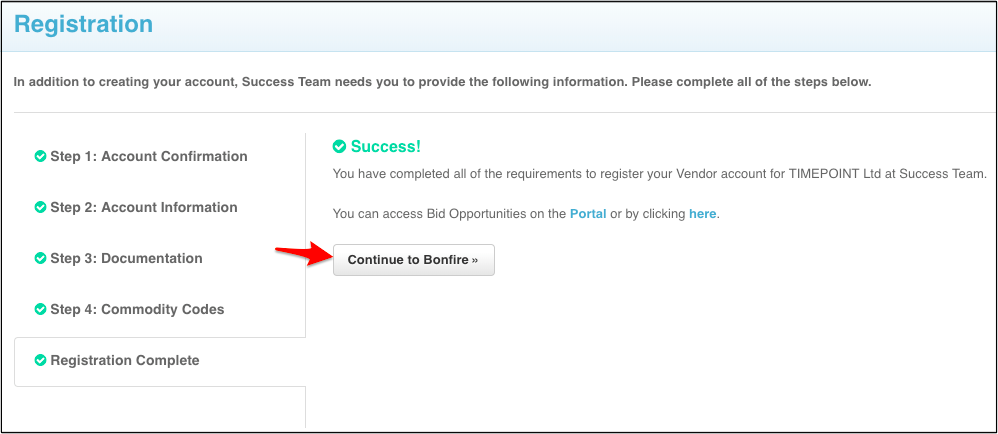
Congratulations! You have completed the registration process and can now view opportunity documents and create submissions.
NOTE: Your login credentials will work across all Bonfire organizational portals.